Showing posts with label breakfast. Show all posts

Wednesday, December 20, 2017

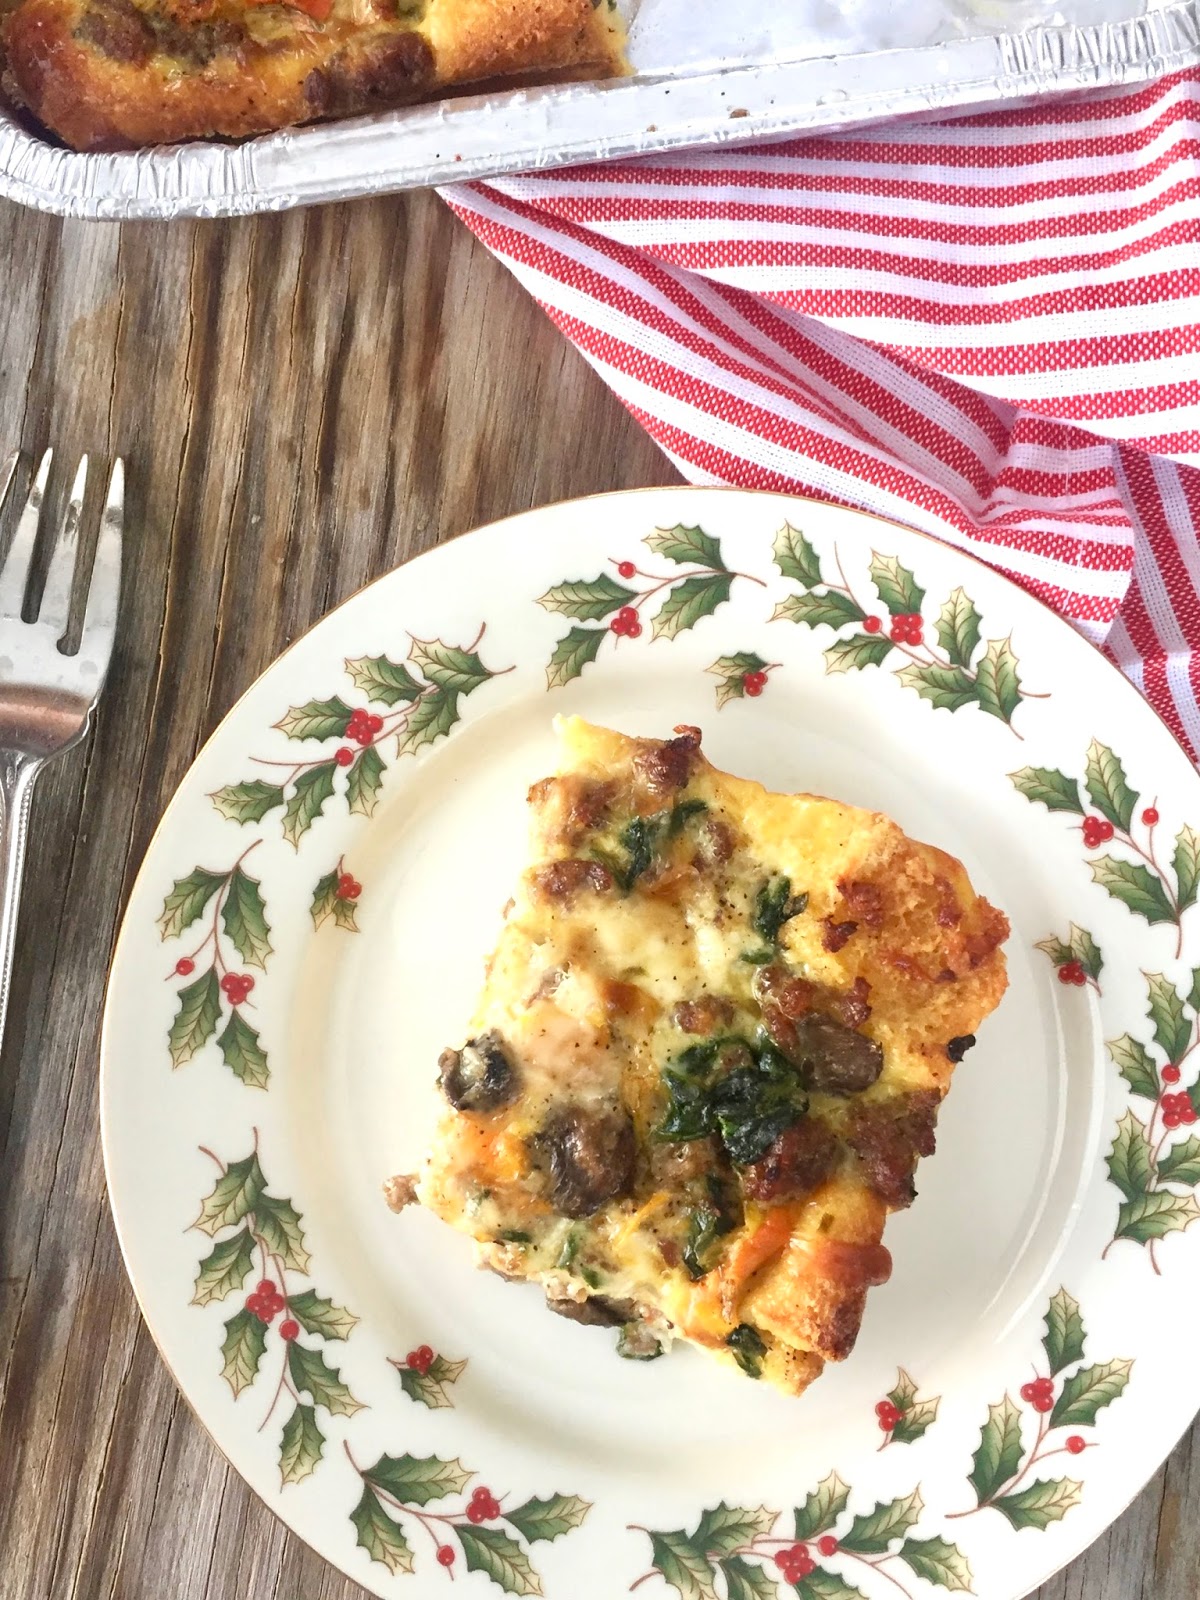
easy make-ahead breakfast casserole


Every year, beginning in October or so, I start thinking about possible Christmas gifts for my friends. I look through endless cookbooks for cookies, breads, or candies, I Google, I invent ideas, and then I finally land on something.  It's a fun process, but I really want the end result to be enjoyed, useful, and - of course - straight from the kitchen.  

This year, I thought about what could be tasty AND helpful, and I came up with the idea of gifting a breakfast casserole.  I had in mind several of the recipients who were hosting their in-laws, their college kids, or just their own immediate families, and I thought it might be neat to have a frozen, ready-to-thaw-and-bake breakfast on hand.  At least it would be one meal taken care of for them. For a few, I paired the casserole with the cinnamon swirl bread from my last post, and for others, I par-baked and froze these cinnamon rolls.  All of them I tied off with a small bag of flavored coffee.  

I have to say this casserole is one of the tastiest I've ever had.  The array of vegetables absolutely makes it and the ability to adjust and customize to one's liking is its best feature!  For the casseroles I gave away, I did a combination of breads for the bottom layer - sourdough, country white, and whole wheat.  For ours here at home, I used this sandwich bread, which I've been using for the last few months as I watch my carb intake.  The bread could easily be left out or replaced with some kind of potato, if desired.  To gift, I made the casserole in an aluminum pan through the last step before baking, wrapped in plastic wrap and then foil, and then froze it completely over night.  I provided the instructions on how to thaw and bake when I delivered the final product.  

If you are needing an idea for breakfast, brunch, or even a dinner over the next couple of weeks, I think you will find this recipe a winner.  You can sub and adjust to your heart's desire... any kind of protein, bread or vegetable, it's your choice!  And I love options, don't you?  But more than anything, I love great flavor.  Bon appetit!  

Easy Make-Ahead Breakfast Casserole

makes one 9x13 or two 8x8 pans

  • 3/4 lb uncooked sausage, casings removed (or meat of choice)
  • 1 tsp dried rosemary (optional)
  • 2 bell peppers, diced ( I used yellow, orange and red)
  • 1/2 medium onion, diced
  • 1 tsp minced garlic
  • 1 cup sliced mushrooms
  • 1 cup fresh spinach
  • salt and fresh ground pepper
  • 4 slices day-old bread of choice, cubed (you can put in 400 degree oven for a few minutes, if needing it quickly)
  • 10 large eggs
  • 1/2 cup milk (I used whole, but any milk will work)
  • 1/2 cup shredded cheese (again, choose your favorite, but I used pepper jack 
1. Cook sausage (and rosemary, if using) until fully browned.

2. Once some fat has been rendered from the sausage, pour a couple of tablespoons in a separate pan and cook the onions and peppers until tender, about 7-10 minutes while sausage finishes cooking.  

3. Add in garlic and mushrooms and cook a couple of minutes before adding spinach.  Cook briefly until spinach just wilts. 

4. Pour vegetables and sausage into large bowl and thoroughly combine, adding salt and pepper to taste.

5. Place bread in bottom of pan/s coated with butter.  

6. Beat eggs, milk and 1/4 cup of the cheese until well blended.  Pour half of the mixture over the layer of bread.

7. Layer the sausage/vegetable mixture over the eggs and pour remaining egg mixture over that.  

8. Finish with the remaining cheese and another sprinkling of salt and pepper.  

9. If freezing, wrap in plastic and then foil and place in the freezer for up to three months.  When ready to use, thaw in fridge overnight, bring to room temperature and cook at 375 degrees for 40-45 minutes, or until good and browned and center is set.

10. If using next day, cover casserole and place in fridge several hours, or overnight.  Bring to room temperature, and cook at 375 degrees for 40-45 minutes, or until good and browned and center is set.

11. Cool for 10 minutes, slice and serve.

Recipe from Sally's Baking Addiction. 


Saturday, June 17, 2017

make-ahead blueberry oven french toast


It has definitely been the season of graduations, weddings, showers, and the like, so I thought this might be the perfect time to share this recipe.  It would be a wonderful addition to a brunch!  Or, if you like finding a cabin or condo to land for vacay, and need a few great recipes for a crowd, you might want to try this as well.  This can be made ahead and refrigerated, so it's a terrific option when you have to host company the next morning.  I love the idea of prepping at night, so I can enjoy the guests; this is why I gave this recipe a try to begin with.  A couple of weeks before our mission trip, the girls from our team hung out overnight for a movie and some pre-trip bonding.  This came in super-handy the next morning!

As I continue to dream of the B&B one day, I'm definitely tucking this one away.  The blueberries and streusel-like topping add so much sweetness, no syrup is necessary.  But a dusting of powdered sugar or dollop of whipped cream with a fresh zest of lemon would be a great addition.

A lot of life has occurred since the last time I posted, including our mission trip.  I'm looking forward to sharing a traditional Navajo recipe one of the locals taught us.  Until then, here's to brunch and blueberries!

Blueberry Oven French Toast

makes six servings

  • 1 large loaf Italian French bread, sliced 1 inch thick (stale is better)
  • 6 eggs, beaten
  • 1 1/2 c milk
  • 1 1/2 c half-and-half
  • 1 t vanilla extract
  • 1/2 t lemon extract
  • 1 t cinnamon
  • 1/8 t nutmeg
  • 1 1/2 c blueberries
  • 1/2 c butter (chilled helps)
  • 1/4 c flour
  • 1 c brown sugar
1.  In a greased 13x9" pan, arrange enough bread slices in a single layer to cover the bottom of pan; set aside.

2. In a large bowl, whisk together eggs, milk, half-and-half, extracts and spices; pour over bread. Cover with plastic wrap and refrigerate overnight, or for 8 hours.

3. When ready to cook, uncover and sprinkle with blueberries.

4. Cut together butter, flour and brown sugar until crumbly.

5. Sprinkle mixture over blueberries.

6. Bake uncovered at 350 for 40 minutes.  

Recipe adapted from Gooseberry Patch, Church Potluck Favorites.


Friday, January 6, 2017

weekend cinnamon rolls


Let me start out by saying that my favorite thing about this recipe is the fact it comes from my newest cookbook, My Recipes from Ruth's Kitchen, which is a collection of recipes beloved by John's great-aunt, Ruth, and put together by her daughter-in-law.  Let me tell you, it's a treasure trove of recipes, many of which came from Ruth herself and others contributed by close family.   I adore the intermittent stories behind some of the contributions, the family history woven throughout is endearing, and I love the nostalgia.

From what I understand, Ruth was not only an incredible cook, but she was quite a well-known candy maker around town, especially at Christmastime.  Every single one looks like such a treat!  I am already counting the days until the Christmas 2017 season, so I can give them a try.

And then there's the icing... Oh, my goodness-gracious, sakes alive.  It is absolutely delicious.  I did substitute the milk or half-and-half it called for with whole cream.  Maybe that's what took it over the top. 

These really are simple, hence the name of them.  And most of you, if not all, should have all ingredients on hand.  These rolls don't even require yeast, which is why I wanted to give them a try.  They had me intrigued, that's for sure.

If you are looking for a yeasty, fluffy roll, this is not it.  You'd be better off with my Amish Cinnamon Rolls, or better yet, Heavenly Cinnamon Rolls.  But if you think you would enjoy brown sugar and cinnamon all nestled in a spiral, flaky, tender, biscuit-like pastry, this is the recipe.  I'm hoping to make another pan this weekend and take to some neighbors that just moved in, which means there will happen to be an extra pan of them just lying around.  Hmm... wonder what I'll do with those?

With the slight let-down that always follows the week after the holidays for me, nothing sounds better than firing up the Keurig and popping these babies in the oven on a cold Saturday morning. Thank you, dear Lord, for the warmth and comfort even the simplest of life's pleasures can bring.  

What's your favorite sweet roll at sunrise?

Weekend Cinnamon Rolls

makes about 16 rolls

For the rolls
  • 4 cups self-rising flour
  • Buttermilk 
  • 2/3 cup shortening
  • 1 stick butter or margarine
  • Brown sugar (I used 1/2 cup)
  • Cinnamon (I used 2 tsp)
For the icing
  • 2 cups powdered sugar
  • 1 tbsp softened butter
  • 1 tsp vanilla
  • half-and-half or milk heavy cream to make a fairly thin glaze
1. Cut shortening into flour until it resembles meal.  Stir in enough buttermilk until dough leaves side of bowl (I used about a 1/4-1/2 cup).

2. Place dough on a well-floured surface and knead a few times.

3. Roll out dough into a rectangle (about 10x20-inch) about 3/8-1/2 inch thick.  Soften the butter to spreading consistency. Spread over the surface of the dough.Spread the brown sugar over the butter and sprinkle with cinnamon.

4. Roll up the dough along the long edge; I used a bench scraper (like this one) to help lift it off the counter and help prevent sticking.  Pinch the edge of the dough to seal.

5. Cut the dough into 3/4-inch slices.  Place the rolls (touching) on a greased cookie sheet. (I used two cake pans for mine).  Bake at 425 degrees until lightly browned.

6. Meanwhile, mix the powdered sugar, butter, and vanilla with enough cream to make the glaze.  Spread the glaze over hot rolls and serve immediately.  


Saturday, December 10, 2016

lazy daisy waffles


I have a man living in my house who is not my husband.  I'm not sure how it came to be, but much to my dismay, Daniel cannot be referred to as a boy any longer.  He has nearly passed me in height, has definitely passed me in shoe size, and his voice has dropped ten octaves.  Well, maybe just one, but  when it seems like it was just yesterday he was learning how to say his first words, one can feel like ten.

Not too long ago, he had a couple of friends over to spend the night.  In the quiet of the morning, as we were getting ready to head to Luke's ballgame, he and his friends erupted in laughter and started joking around.  The TV wasn't on, music wasn't playing.  The sound was so immense, I think our walls rattled.  I looked at John and said, "Those men we hear up there are our son and his friends."  It almost came out of me as a lament.

Lately, we have had several weekends of boys men hanging out, and just as the voices have dropped, so have their stomachs expanded.  That means lots of food needs to be on hand.

Parents of teenage boys, can I get an, "Amen!"

I have clung to this recipe every time, and I love it. You just can't mess these up.  And you want to know the best part?  You can make the batter and store in the fridge!  So easy!  Just throw out your favorite toppings on the counter... chopped fruit, nuts, syrup, honey... you name it.  And don't forget the chocolate and caramel drizzle, oh, and Luke would say the can of whipped cream.  A waffle bar on a Saturday morning might be my favorite thing going lately.  Give it a whirl.  You'll be "waffle-y" glad you did!


Lazy Daisy Waffles

makes approximately 8 Belgium waffles (depends on size of iron)
  • 2 eggs
  • 2 cups all-purpose flour
  • 1 3/4 cups milk
  • 1/2 cup vegetable oil
  • 1 tbsp white sugar
  • 4 tsp baking powder
  • 1/4 tsp salt
  • 1/2 tsp vanilla extract
1. Preheat waffle iron. Beat eggs in large bowl with blender until fluffy. Beat in flour, milk, oil, sugar, baking powder, salt and vanilla, until smooth.

2. Spray waffle iron with cooking spray. Pour mix onto hot iron. Cook until golden brown. Serve hot.

*To keep warm until ready to serve, heat oven to 200 degrees and place on cookie sheet in a single layer.


Saturday, October 8, 2016

old-fashioned pancakes


There really is nothing better than cooking something your entire family enjoys.  It fills up my heart to hear a cheer, see a fist pump, or note an under-the-breath "Yes!" when I announce the meal we're having.  Such is the case every time I tell the boys we're having pancakes.  All three of them!  

I have tried numerous pancake recipes.  Numerous, I tell you.  But some have been too thick, some too tough, some with no taste whatsoever.  It's like a page out of Goldilocks and the Three Bears.  Thankfully, I have found the one that is just right.

This recipe is quick and easy and no-fail.  It's been my go-to for several months.  Sometimes we toss in a few chocolate chips or berries.  My favorite add-in combo is cinnamon and pecans.  It's really fun to experiment!  Do you have a favorite variety?

Saturdays are made for PJs and coffee, pancakes and syrup, and - of course - bacon, if you're in the Green household.  Wishing you and yours a lovely weekend!

Old-Fashioned Pancakes

serves 8
  • 1 1/2 cups all-purpose flour
  • 3 1/2 tsp baking powder
  • 1 tsp salt
  • 1 tbsp sugar
  • 1 1/4 cups milk
  • 1 egg
  • 3 tbsp butter, melted
1. In a large bowl, mix together flour, baking powder, salt and sugar.  Whisk together until well-sifted.

2. Make a well in the dry ingredients, and pour milk, egg and butter inside.  Mix until smooth.  

3. Heat lightly oiled griddle until hot.  Pour batter, 1/4 cup at a time, on griddle and cook until golden on both sides.

Recipe from All Recipes.


Saturday, September 3, 2016

summer in the south - blueberry buckle coffee cake


I have to admit that I'm really never sad to see summer on its way out.  I know.  I'm completely and totally in the minority.  I'm OK with it.

I do enjoy all the seasons, and I look forward to summer.  Work slows a bit, and June and July allow me to be with my family a little more.  But I've always been - and always will be - a sucker for cooler temperatures and a need to pull a great cozy blanket over my toes to start perusing cookbooks for caramel apple somethings or pumpkin spice whatevers.

Of course, since we're only leaning into Labor Day weekend, and the autumn season is not yet here, I thought I should feature a brand new recipe to use up the last of any berries you might have from your summer picking.  Actually, the recipe is for blueberries.  Hence, the title.  But as I have thought about it, there's really no reason you couldn't replace with another favorite.  I think blackberries would be heavenly.

We had a birthday breakfast at school earlier this week, and I decided to give this recipe a whirl.  I also made one for my family, because unfortunately, thankfully, they give me honest feedback and help me decide what's worth keeping and posting.  When Daniel asked me every morning this week, "Mom, do you have any more of that cake?", I knew we had a keeper.

The original recipe called for a drizzle, but I'm here to say, "Not needed."  The cake and crumble topping is divine and absolutely sweet enough.  In fact, I really like how the tart aspect of the berries breaks through much of the richness.  It has a good, balanced flavor.

I am really looking forward to an extra day this weekend and enjoying the drop in humidity.  Some football, good eats and time with my three guys is definitely calling my name.

Come to the feast,
Jen

Blueberry Buckle Coffee Cake


For the cake
  • 2 cups all-purpose flour
  • 1/4 cup sugar
  • 2 1/2 tsp salt
  • 1/4 cup shortening
  • 3/4 cup milk
  • 2 cups blueberries
For the crumb topping
(mix all ingredients together until crumbly)
  • 1/2 cup sugar
  • 1/2 cup all-purpose flour
  • 1/4 cup butter, softened
  • 1/2 tsp cinnamon
1. Mix together flour, sugar, baking powder, salt, shortening and milk.  Beat for 30 seconds; carefully fold in berries.

2. Spread batter into greased 9-inch cake pan; sprinkle with crumb topping.  

3. Bake at 375 for 45-50 minutes.

Tips and Tricks:

Cut a round piece of parchment paper the size of the cake pan. Spray both the paper and the pan. Once cake finishes cooking, let cool for five minutes and turn over to easily remove from pan. Peel off the parchment and place on cooling rack.


Saturday, February 6, 2016

saturday morning special ~ egg-in-the-hole sandwich


The speed of life has definitely returned to normal, and there have been far too many days since my last post.  But I couldn't think of a better one for a Saturday morning return than this one!
I've mentioned before how we love our Saturday breakfasts.  They're not always big, but many times they're more special than the bag of cereal or occasional sausage and piece of cinnamon toast we take in the car during the week.  

This sandwich definitely qualifies as special.  The combination of smokey bacon, slightly sweet and seared potato bread, all laced in warm egg and melted cheese... Yes.  Special.  That's a good word for it.  It is very easy, and so, very filling.  A great way to kick-start a day, for sure.

I'm looking forward to this weekend and a little more time to enjoy my boys and good food.  I hope you have a wonderful Saturday and can find a moment to fire up the griddle for something - and someone - special, too!

Egg-in-the-Hole Sandwich

  • 2 pieces potato bread (like this one)
  • 2 eggs
  • 3 slices bacon (I prefer thick-sliced for this)
  • 1 slice sharp cheddar cheese
  • 2 tbsp real butter
  • salt and pepper
1. While griddle is heating, cook bacon in pan until done, remove from pan and lay on paper towels to remove excess grease.

2. Transfer about 1-2 tbsp of bacon grease to griddle, add butter, and heat until butter melts.

3. While butter is melting, cut hole in bread using a 2-inch round cookie cutter or biscuit cutter.  Of course a fun shape, like a heart, would be cute, too!

4. When butter/grease mixture is heated, spread on griddle to cover enough surface for mixture to cover bread pieces when flipped.  

5. Place each piece of bread on the griddle, making sure the hole has adequate butter/grease in it to keep egg from sticking.  

6. Crack eggs carefully, one at a time, and pour in each hole of bread.  Cook until slightly set and flip over, taking care not to bust yolks.

7. Place bacon slices on one slice of flipped bread.  Layer with cheese and top with second piece of bread.  Season with salt and pepper.

8. Flip sandwich one more time to make sure not to overcook bottom egg.  A perfectly runny yolk is key, here. Season again.

9. Remove from griddle once cheese is melted.  Cut in half and serve immediately.

Idea from Bon Appetit!

Friday, October 30, 2015

sour cream maple muffins


All in the family, all this cooking and taking pictures thing is.  I was running an errand last Saturday morning, and within about five minutes I received a ton of texts from Luke.  Apparently, he got a wild hair to cook himself breakfast in my absence, and this was the final result. Chocolate Chip Pancakes with a bit of whipped cream.  He begged me to put it on the blog.


Not bad for an 11 year old!  But keep in mind, the pancakes had been pre-cooked and frozen.  At any rate, I was proud, and I thought his photo captured the perfect Fall Saturday morning breakfast feel! 

Speaking of pancakes, these little treasures are a must-make, if you like pancakes.  In one tender bite, you taste the butter, maple syrup, toasted pecans... It's such a great blend of flavors with a just-right sweetness.  It's been a long time since I've made muffins, but these have most certainly put me back in the mood!


Sour Cream Maple Muffins

makes about 40 mini-muffins
1 3/4 cups all-purpose flour
2 tsp baking powder
1 tsp baking soda
1/2 tsp salt
1/2 cup unsalted butter, at room temperature
3/4 cup maple syrup
1 cup sour cream
1 egg
1/2 cup chopped pecans, toasted

1. Preheat the oven to 400 degrees.  Butter muffin tins.

2. In a small bowl stir and toss together the four, baking powder, baking soda and salt.  Set aside.  In a medium bowl beat the butter until smooth, then slowly add the maple syrup, beating constantly.  Beat in the sour cream and egg.  Stir in the pecans.  Add the combined dry ingredients and stir just until blended.

3. Spoon into the prepared muffin tins, filling each cup about two-thirds full.  Bake until a toothpick inserted in the center of a muffin comes out clean, about 8-10 minutes.  Cool in the tins about 5 minutes, then remove.

Recipe very slightly adapted from Williams-Sonoma.


Wednesday, December 17, 2014

over-the-top pumpkin waffles


I have not yet tired of pumpkin this season at all.  I'll admit it.  Some years I do.  I don't know what is different this year.  Maybe I haven't had as much of it, or maybe I'm just changing in my preferences, but I'm still drawn to it even half-way through December.  

I know I've mentioned on the blog how much our family loves breakfast, and we really love it on a Saturday morning.  It's so nice to lazily begin the day in my dilapidated well-loved moccasins and pj's, hair in a top-knot and drinking a mug of coffee while playing around with whatever is in the fridge or pantry.  There's rarely a plan on Saturdays.  

Actually, there's rarely a plan any day, but I digress.  

Anyway… especially Saturdays, everyone has to go with the flow when it comes to meals.  

So when I decided to do pumpkin waffles a while back, and then while digging through the freezer stumbled upon some Pumpkin Maple Swirl Butter and Honey-Glazed Pecans, my typical lazy approach to breakfast suddenly switched into high gear.  I couldn't WAIT to try all of these flavors together and found myself describing them upon first bite as "over the top."  Each square indention of the waffle held the melted butter, syrup and pieces of pecans beautifully.  Every single bite was a joy.  

So, I suppose I just answered my own question regarding my continued interest in pumpkin well into December.  Seriously.  I say with recipes like this one, here's to pumpkin 'til May!

Over-the-Top Pumpkin Waffles
makes 4-5 servings

  • 1 1/2 cups fresh pumpkin, pureed (or 1 can pumpkin)
  • 2 1/4 cups all-purpose flour
  • 1 tsp baking powder
  • 1/2 tsp baking soda
  • 1 tsp salt
  • 2 tsp pumpkin pie spice
  • 1/2 cup packed light brown sugar
  • 2 large eggs, separated
  • 1/4 cup plain Greek yogurt
  • 1 cup whole milk
  • 4 tbsp unsalted butter
  • Honey-Glazed Pecans for topping waffles
  • Pumpkin Maple Swirl Butter
~ Heat waffle iron according to directions.

~ In large bowl, whisk together all dry ingredients until fully incorporated.  

~ In another bowl, whisk together egg yolks and sugar, adding in puree, yogurt, milk and 
    butter.

~ Pour pumpkin mixture into dry ingredients, stirring gently with rubber spatula just until 
    combined.  

~ Beat egg whites until stiff peaks form and fold into batter.

~  Spoon onto heated and greased waffle iron.  Keep warm in 250 degree oven, directly on 
    rack until ready to serve.

~ Plate topped with pecans, butter and syrup as desired.

Waffle recipe from the Food Network.

Tuesday, September 30, 2014

heavenly cinnamon rolls with caramel icing


You may or may not remember this post, when I expressed my slight frustration with the fact that Luke rather have Pillsbury cinnamon rolls than mine.  And here I shared that I finally found a version he would approve.  I am excited to say, the recipe below is another tally mark for me, and it came from a rainy Saturday night stuck in the house trying to scrounge up ideas for Sunday breakfast.  Because who in the world wants to go to the grocery store for a can of Pillsbury in the rain on a Saturday night, right?

I have used this yeast roll recipe time and time again, with no trouble.  In fact, I recently found out it goes above and beyond in the "can't mess this one up" category.  Those of you who can struggle with successful yeasted breads, prepare to be amazed!

A couple of  weeks ago, I had put the dough in the fridge over night so I could make fresh rolls for a meal I was taking to friends the next day.  To my frustration that morning, I found the lid had come off, leaving the dough deflated and even dried out on the top.  I figured I had nothing to lose, removed the dried layer, re-kneaded the dough slightly, then let it rise in a warm oven.  Before we left for church that morning, I had plenty of warm, soft rolls that tasted as good as if nothing had gone awry. 

I love recipes like that.

So back to the rainy Saturday night.  I thought about the yeast roll recipe and figured I could try adding more sugar to the dough, find a delicious icing, and maybe - just maybe - I'd have a couple of happy boys the next morning.  To my delight, and theirs, my trial baked up beautifully and my wish came to be.  Luke gobbled them up, and my heart was warmed.  

So here's to the third cinnamon roll recipe on the blog.  Can there really be too many?!? 

Heavenly Cinnamon Rolls with Caramel Icing     

For the rolls:
  • 1 1/2 cups warm water
  • 1 tbsp. yeast
  • 6 tbsp. sugar
  • 2 tsp. salt
  • 4 tbsp. butter, melted
  • 4 cups bread flour
For the filling:
  • 1 cup brown sugar
  • 1 tbsp cinnamon
  • 1/4 cup butter, melted
For the icing:
  • 4 oz. cream cheese
  • 1 tbsp unsalted butter
  • 3 tbsp caramel sauce
  • 1 tbsp milk
  • 1/2 tsp vanilla extract
  • 1 cup confectioners sugar
~ Dissolve the yeast and sugar in the warm water.  Let sit until foamy; about 5 minutes.

~ With dough hook, mix in salt, butter, and flour until fully incorporated.  Continue to mix 
    about 10 minutes (or you can remove the flour and knead by hand a fully twenty minutes;
    MAJOR triceps workout!)

~ Remove dough and place on lightly floured surface, kneading 10 more minutes (if you
    kneaded the first 10 with the hook) until smooth and elastic.

~ Place dough in large, lightly greased bowl, turning once to cover the top.  Cover and let
    rise in a warm place until doubled in size, about an hour.

~ Uncover dough and punch down. 

~ Roll dough into rectangle, approximately 1/4 inch thick.   

~ With a pastry brush, cover dough with butter, leaving a 1/2 inch border around edge.

~ Mix together brown sugar and cinnamon, reserving 1 tbsp of mixture.  Sprinkle dough 
   liberally with remaining sugar/cinnamon.

~ Roll dough, starting with long side, and evenly slice.

~ Heat oven to 375 degrees.

~  Place cut rolls into greased pans and let rise about 30 minutes.

~ Cook rolls about 20-25 minutes, or until golden.

~ While rolls cook, whip together cream cheese and butter until fluffy.  Add caramel and 
    blend.

~ Mix in milk and vanilla until incorporated.  Gradually add in sugar and mix well.

~ Top warm rolls with caramel icing.  Sprinkle tops with reserved sugar and cinnamon.


Caramel icing recipe from Annies Eats.

Tuesday, June 3, 2014

new every morning bread


"The steadfast love of the Lord never ceases. His mercies never come to an end. They are new every morning…"  
Lamentations 3:22-23

I've always been a morning person, and, oh, how I love the words of the verse above.  They refresh, they renew, they restore hope.  Watch the 10:00 news for five minutes or read internet headlines and you understand why meditating on them is so absolutely necessary.


This has become my favorite place in our house, I do believe.  The chair gets comfier every time it's occupied, my great-grandmother's quilt envelops me, and it's the meeting place for God and me every morning at 5:00.  Even though its only two or three feet from the edge of my bed, there's something comforting about knowing I'm heading to that spot at sunrise to receive His new and endless mercies.  It's a gift.  And all He's asked me to do is just show up.    

The chaos and stress of mornings can make it one of the absolute hardest times of the day, but sustenance can make all the difference in the world.  The feeding of the soul and the body can make for a hopeful start, that's for sure.

This is a great recipe to get you going and so easy to grab and go.  You can make substitutes to your liking, but I like it just like this.  Mom made it the first time I had it, and I instantly loved it.  The next time I craved it, I made it, though slightly different, due to some ingredients I didn't have on hand.  No matter the version, it works, and it's very healthy.  But beware… it won't last long!

New Every Morning Bread
makes one loaf
  • 1 banana, mashed
  • 1/2 cup plain Greek yogurt
  • 1 egg, beaten
  • 2 T oil
  • 1/2 tsp pure vanilla
  • 1 carrot, grated
  • 1/2 cup dried cranberries
  • 1/2 cup pecans, toasted and chopped
  • 1/4 cup wheat flour
  • 3/4 cup granola cereal
  • 1/4 cup brown sugar
  • 1 tsp baking powder
  • 1 tsp cinnamon
  • 1/2 tsp baking soda
~ Pre-heat oven to 400 degrees.

~ Grease and lightly flour 9x5 loaf pan.  

~ Mix all wet ingredients together, stirring in cranberries and nuts.  Add in dry ingredients 
    in the order listed just until moistened.  

~ Fill pan and bake until golden and edges begin to pull away from sides of pan, about 
   45-55 minutes.

~ Cool in pan 5 minutes then remove and cool on rack.  Serve immediately or wrap tightly 
    and store in refrigerator.


Saturday, June 8, 2013

saturday morning love - word pancakes


I don't think breakfast can get any more fun, do you?  I had a couple of happy kiddos!  You will too.  Enjoy your Saturday! 

Word Pancakes
Ingredients:

  • 1 batch of your favorite pancake batter 
  • 1 plastic squeeze bottle
  • 1 griddle
  • 1 family to share in the fun
~ Preheat griddle until water drops "dance" on top.  Mine is perfect at 375 degrees.
~ Pour batter into the squeeze bottle; tip needs to be cut to about 1/8 inch opening to 
    allow for steady flow.
~ Shake batter towards the tip side, so that no air bubbles disrupt the flow.  
~ Squirt away.  It's SO FUN!

Tips and Tricks
Do a small test run.  If needed, add a bit more water to thin or batter to thicken.  But as with any pancake batter recipe, over stirring will toughen the results.

Tuesday, April 30, 2013

cream cheese biscuits


"Square is the new round."  

This recipe comes from America's Test Kitchen and has completely done away with the problem of over-handling/over-kneading biscuits by suggesting to cut them in squares.  

What!?!?!  Why didn't I ever think of that?  I'm telling you... it's the smartest thing I've seen in a long time.  Ingenious.

Now, I know to traditionalists it might take a while to accept a square biscuit.  But to those of us who just want a tender and great-tasting result, it's life-changing!  All three of the boys gobbled these up with no trouble at all.  They are full of flavor, and have a rustic flair.  Right up my alley.  And I think they might be my biscuits of choice for the time being.

If you are unfamiliar with America's Test Kitchen, do a little research.  They have perfected recipes from a scientific perspective, understanding the chemistry of food and altering recipes accordingly.  They've made all the mistakes so we don't have to!

I highly suggest you grab your favorite jar of jam or honey bear and bake up a basket of these biscuits.  Mark my words.  It's hip - and delicious - to be square!


Cream Cheese Biscuits - makes 12 biscuits
Ingredients:

  • 1 1/2 cups all-purpose flour
  • 1 1/2 cups cake flour
  • 1 tbsp. sugar
  • 1 tbsp. baking powder
  • 1 tsp. salt
  • 3/4 tsp. baking soda
  • 4 ounces cream cheese, cut into 1/2-inch pieces and frozen 30 minutes
  • 4 tbsp. unsalted butter, cut into 1/2-inch pieces and frozen 30 minutes
  • 1 cup plus 1 tbsp. buttermilk
~ Adjust oven rack to middle position and heat oven to 450 degrees. 
~ Line baking sheet with parchment paper.
~ Pulse all-purpose flour, cake flour, sugar, baking powder, salt, baking soda, cream cheese,
    and butter in food processor until mixture resembles coarse meal.  Transfer to a large
    bowl.
~ Stir in buttermilk until combined (dough may appear slightly dry).
~ Turn dough onto lightly floured surface and knead briefly until dough comes together
~ Roll dough into 8 by 6-inch rectangle, about 3/4 inch thick.
~ Cut into twelve 2-inch squares and transfer to prepared baking sheet.  
~ Bake until light brown, 12-15 minutes.
~ Transfer to wire rack and let cool 5 minutes.  Serve warm.

Tips and Tricks:
When kneading, dough will be crumbly.  Don't let this scare you.  Just bring together and roll out to cut.  The "crumbs" are actually the "pieces" of butter and cream cheese that will melt throughout the dough.  It works beautifully.

To make ahead, unbaked cut biscuits can be refrigerated on baking sheet, covered with plastic wrap, for 1 day.  To finish, heat oven to 450 degrees and bake as directed.  


Friday, April 5, 2013

flashback friday - ma's sweet rice


As frustrated as I can get with Luke about his preference for all things sweet, I have to remind myself it's a pot-calling-the-kettle-black kind of thing.  The sweet tooth is hereditary, I can promise you, and it came straight from me.  I had no choice, mind you.  Between my dad and my grandmother, I was destined to crave the more dessert-type fare, breakfast, lunch, or dinner.

Today's flashback takes me to many, many mornings... especially those on the cooler side... when I would make my way up the stairs to my grandparent's kitchen to eat before leaving for school.  I'd sit at the far end of the kitchen table/bar - the kind made from white formica, complete with those teeny tiny golden flecks of paint - and watch the small black and white TV at the other end.  Following Captain Kangaroo was a local children's morning show, The Peggy Mitchell Show, that I loved.  So much so, I even made an appearance on it, once.  In fact, when Ms. Peggy's puppet asked me what I wanted to be when I grew up, I told her, "deaf."  That was followed by the puppet's jolting turn towards me, and in Peggy's own voice rather than the puppet's, a squalling, "What?!?!?". 

It's hilarious for me to even think about now.  I can't imagine what the TV audience thought as they watched!  Obviously, I didn't want to be deaf, but I was very interested in working with special needs children and was learning sign language with my mom, a special education assistant at the time.  "I want to be an interpreter for the hearing impaired" was just not coming to mind at seven years old, so "deaf" it was.

At any rate, those mornings were precious to me as I'd watch Popie get ready for work and Ma stand at the stove, stirring and stirring.  Nine times out of the ten, she was making this rice... sweet rice, that is.  There was no other kind in Ma's book.  Right off the burner, I remember her always pouring it straight out of the pan into my bowl and wonder why I wasn't eating it up.  I didn't have the heart to tell her it would burn off my tongue if I did.  So I'd blow and blow (and blow some more) while she asked me one thousand times if it needed more sugar, a bit more milk, and on, and on... 

Bless her sweet four-foot-ten soul.


Nothing.  I mean nothing beats a bowl of this stuff when you need to feel good and warm down to your toes... buttery, creamy, sweet comfort absolutely rolled into every bite.  And if you're really good, you know how to ration the toast just right, so that the last crumb happens to end up right alongside the final spoonful of rice.

I do not measure anything in this.  I take a couple of cups of cooked rice and add whole milk, real butter, real sugar, and cinnamon until just right.  Then I pour it straight into the bowl, steaming hot, because carrying on tradition is half the fun, right?  It is a total "to-taste" deal. Easy, nostalgic...  perfect.    


Wednesday, April 3, 2013

apple almond chocolate chip cookies (no sugar added)


I have a confession to make.  I like All-Bran.

I know.  It's crazy.  When I was a kid, no lie, I was totally okay eating it for breakfast.  To tell you the truth, I kind of craved it.  That doesn't mean I didn't want all the other fun cereals.  In fact, my absolute favorite growing up was Golden Grahams.  Man, I loved that stuff!  But All-Bran was in my bowl many-a-mornings, and it was just fine with me.

I guess because of that, I'm also good with really hearty all-wheat breads, whole wheat pastas, and these "cookies."  This recipe is a result of noticing some dried apples in the pantry needing to be used, that made me think about caramel dipped apples at the fair, which took me to thoughts about the fancier versions found in specialty chocolate and candy stores, which made me think of my favorite dipped apple combo, chocolate dipped apples rolled in nuts.  And that, my friends, is exactly how this brain works most of the time - full speed ahead with a little free association thrown in.  

Thankfully, it turned out (this time) in a decent recipe.

I do want to stress that these treats have no added sugar, but just enough sweetness in the chocolate to satisfy, and they're absolutely perfect with a cup of coffee.  I haven't tried it yet, but I think these could be frozen and heated right before serving.  

Another grab-and-go option for the morning.  Love it!


Apple Almond Chocolate Chip Cookies -
makes about 18 
Ingredients:
  • 1 cup butter at room temperature
  • 2 tsp. vanilla extract
  • 2 large eggs
  • 1 2/3 cup all-purpose flour
  • 1 tsp. baking soda
  • 1/2 tsp. salt
  • 1 cup old-fashioned oats
  • 2 cups (12 oz. bag) dark or semi-sweet chocolate chips
  • 1 cup dried apples, finely chopped
  • 1/2 cup sliced almonds, toasted and chopped
~ Heat oven to 325 degrees F.
~ Cream butter and vanilla until fluffy.
~ Add eggs, one at a time, and mix well.
~ In a separate bowl, whisk together flour, soda, and salt.  
~ Slowly add flour mixture to butter and vanilla while mixer is running.
~ Stir in oats, chips, apples and almonds until fully incorporated.
~ Using a 1/4 cup measuring cup, scoop dough into cup and place on baking sheet 2 inches 
    apart.  My batter came out with a little tapping on the back of the scoop.
~ Bake for 14-16 minutes until cooked through.  
~ Store in airtight container for several days or freeze immediately.


Friday, March 1, 2013

orange glazed cinnamon rolls


If you read my Facebook post a few days ago, you would know I had planned to post a side item this week.  But I was so excited about this particular recipe discovery, the side item got pushed... to the side.

(Sorry.  I couldn't resist.)

You might remember my earlier discussion about Pillsbury cinnamon rolls and Luke's preference for those.  I decided to try my hand again at a homemade version, tweaking the Amish bread dough a bit to shoot for a more sweeter, "Luke-approved" version. 

The results?  

A three-pointer.  All net.  Major score.  In other words, Luke asked for seconds!

This was not rocket science at all, folks.  I just added more sugar; a third of a cup, to be exact.  I also allowed for more room around the rolls as they rose.  

Oh.  And I doused them with an orange glaze.  

Wow. 

The final product was richer, softer, and - dare I say - better than Pillsbury.  

So, I couldn't wait any longer to share the newest version.  I hope you love them as much as we do. We'll certainly keep the originals in the Sunday morning rotation as well, but these will satisfy all four of us, which is a miracle in and of itself.  Cause we all know when Luke is happy, everyone is happy.      

Orange Glazed Cinnamon Rolls - 
makes about 12 large rolls
Ingredients:

For the dough
  • One half of Amish Sandwich Bread dough Amish Sandwich Bread dough (made with 2/3 cups of sugar rather than the original 1/3 called for)
  • 1 cup brown sugar
  • 1 tbsp. cinnamon
  • 1/4 cup butter, melted
For the icing
  • 4 clementines, zested and juiced (we use Little Cuties, but two regular oranges could be used)
  • 1 tbsp. butter, melted
  • dash of salt
  • 2/3 cup confectioners' sugar
~ Preheat oven to 350 degrees.  Grease 9x13 pan.
~ Follow directions for Amish Sandwich Bread through the first rise.  
~ After punching down dough and kneading, take half of dough and roll out into rectangle. 
~ Spread the melted butter over the dough with a pastry brush, leaving about an inch 
    around the edge.
~ Mix together brown sugar and cinnamon, and spread generously over buttered surface.  
    Press mixture lightly into dough. 
~ Starting with the long side away from you, tightly roll the dough towards you.
~ Once rolled, use a sharp serrated knife to slice log into rolls.  If your dough is too soft, 
    you can pop in the fridge for a few minutes to harden.  
~ To ensure uniform thickness, I start in the middle of the log and slice.  I then find the 
    middle of each of the two logs I cut, and cut again.  I continue to slice in the middle of 
    each section until complete.
~ Place cut rolls in pan (pans with sides will produce softer rolls, but for 
    crisper edges, you can use a baking sheet), leaving a little room for dough to rise and 
    swell.
~ Place in warm spot to rise, covered loosely in lightly greased plastic wrap.  
~ Bake in 350 degree oven for 12-15 minutes, or until tops are golden and dough is cooked 
   through.  If needed, tent pan with aluminum foil to prevent over-browning while dough 
   finishes cooking.
~ While rolls are cooking, mix the orange juice, zest, butter and salt together.  Whisk in the 
    sugar and stir until smooth.  Spoon over cooked rolls.

Tips and Tricks
  • If you don't want to cook your rolls immediately, you can loosely cover the pan with greased plastic wrap and place in the fridge after placing cut rolls in pan. When ready to cook, take the rolls out and let them come to room temperature, allowing to rise as normal.


Recipe from The Lazy Daisy Kitchen


Monday, February 25, 2013

cherry chocolate coconut granola


Granola is as versatile as the day is long.  It can be eaten on yogurt, in milk, by the hands full, in ice cream...  I am really loving it lately.  

I am a huge fan of the Caramel Apple variety I made last fall.  I decided for the winter, and in particular, honoring Valentine's Day, I'd search for a chocolate cherry option.  This one fit the bill nicely and made good V-day gifts for the boys' teachers.  

I adore dark chocolate, so I chose to do a Ghiradelli 60% cacao bar as my chocolate of choice. Obviously, if you don't appreciate that deeper, slightly bitter flair, go for milk chocolate.  

Hey!  Maybe you have a chocolate Easter bunny hiding in the back of your pantry too!  

I have shared before how I'd love to have a bed and breakfast one day.  And with that, it would thrill me to have a few items to stock a small shop... a few baked goods, homey art, maybe a smattering of hand-sewn or knitted items.  Maybe I'll have a "granola of the season" to serve for breakfast and also buy by the scoop.  What do you think?  Hmm...  Fall and Winter are covered. On to Spring, I say.  

My wheels are spinning...


Cherry Chocolate Coconut Granola
makes about 14 cups
Ingredients:
  • 2 cups shredded coconut (sweetened or unsweetened)
  • 2/3 cups walnuts, coarsely chopped
  • 2/3 cups sliced almonds
  • 6 cups old-fashioned rolled oats
  • 6 tbsp. canola oil
  • 1 cup honey
  • 1/2 tsp. ground cinnamon
  • 1/2 tsp. salt
  • 2 cups dried cherries
  • 8 oz. chocolate, coarsely chopped
~ Preheat the oven to 325 degrees.  
~ Line a baking sheet with parchment paper.  
~ Place a large* skillet over medium heat.  Add the coconut to the pan in an even layer and
    cook, stirring frequently, until lightly browned and toasted.  
~ Transfer to a bowl and wipe out the pan.  Return the pan to the heat and add the chopped 
    walnuts and sliced almonds.  
~ Cook, stirring occasionally, until lightly browned, about 3-4 minutes.  
~ Stir in the oats and canola oil and continue to cook, stirring occasionally, until the oats
   are lightly toasted, about 3 minutes.
~ Transfer the oat mixture to a large bowl and stir in the honey, cinnamon, and salt.  
~ Spread out onto the prepared baking sheet in an even layer.  
~ Bake, stirring every few minutes, until the granola is light golden brown, about 20 
    minutes.  
~ Stir in the toasted coconut and dried cherries.  
~ Move the granola to one side of the baking sheet and press gently into a thick slab.  Let
    cool to room temperature.  
~ Break the dried and cooled granola into small clusters, mix in the chopped chocolate, and
    store in an airtight container.

Tips and Tricks

*This requires a good amount of ingredients to fit in the skillet.  Make sure to use a large pan or have a stock pot of sorts handy.
  • The mixture might appear "wet" for quite a while.  The original recipe called for stirring and baking for 15 minutes.  Mine was closer to 20 to 22 minutes.  It will harden as it cools.

  • This keeps in an airtight container in the fridge for a good while.  At nearly two weeks, it still tasted fresh.  I think glass containers help with the freshness factor.

Recipe barely adapted from Annie's Eats