Showing posts with label gifts. Show all posts

Wednesday, December 20, 2017

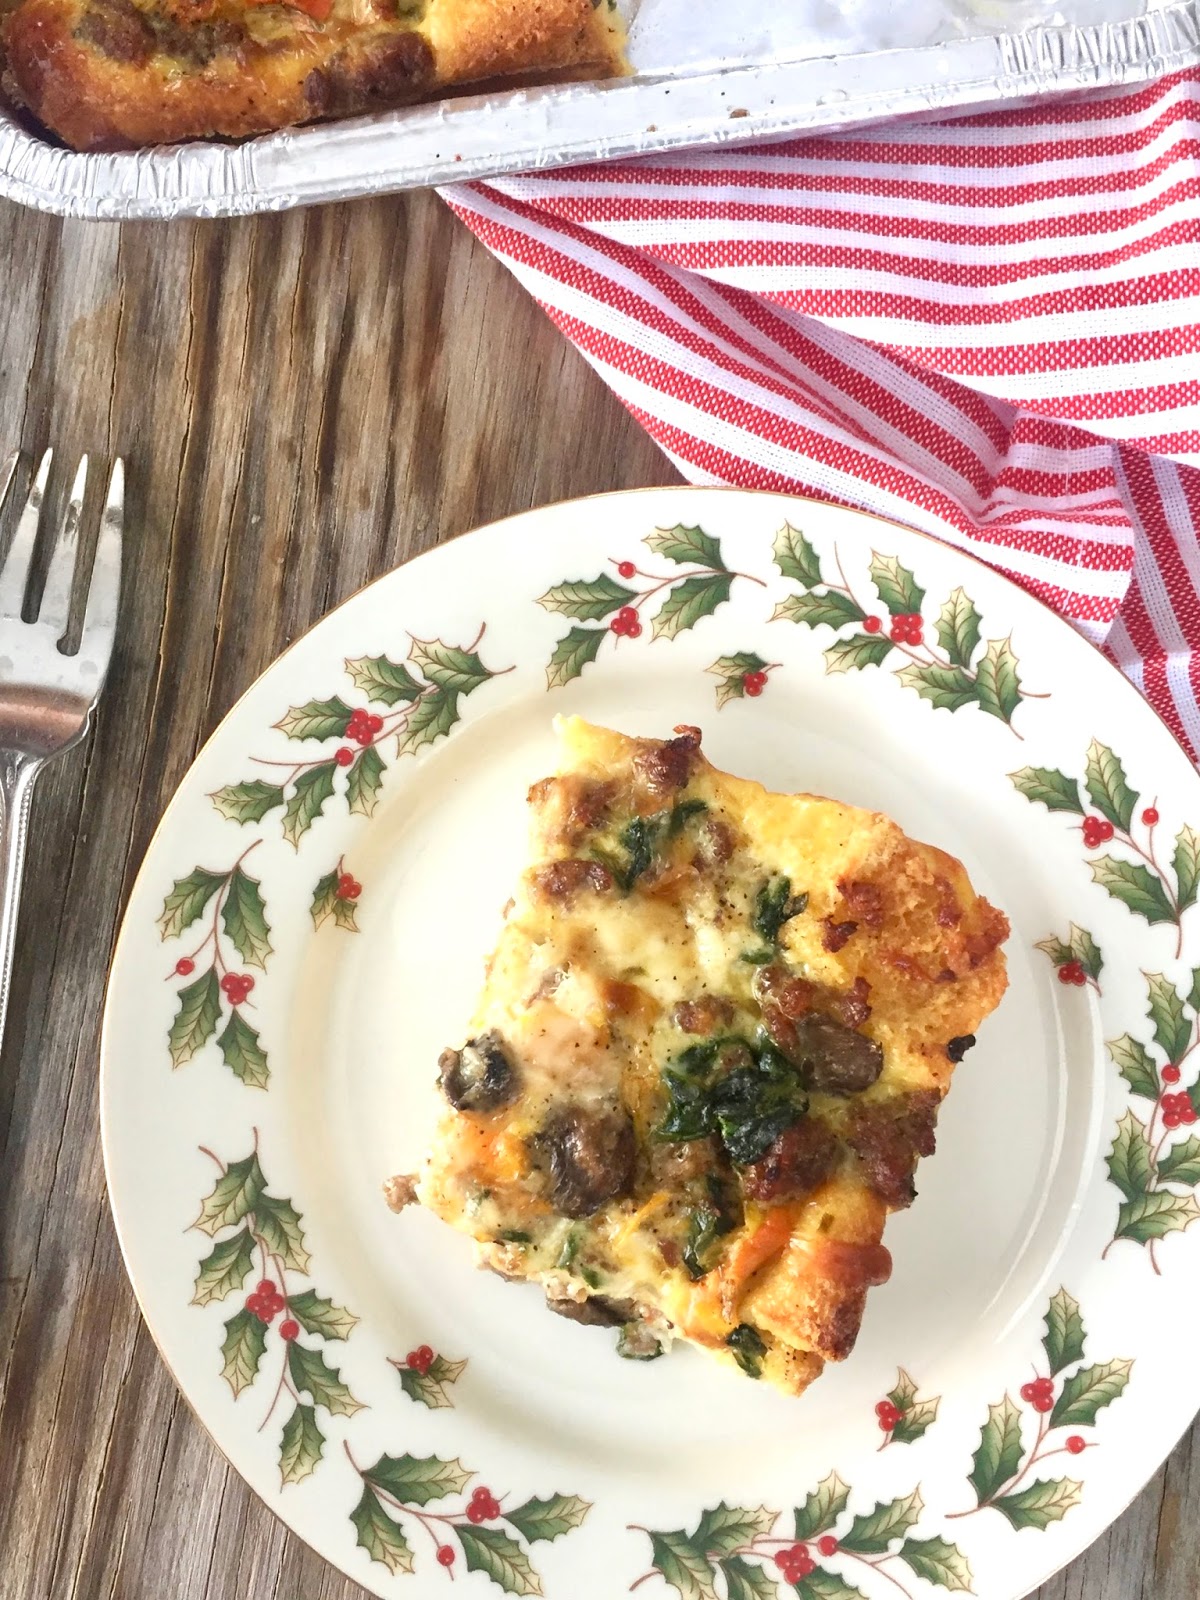
easy make-ahead breakfast casserole


Every year, beginning in October or so, I start thinking about possible Christmas gifts for my friends. I look through endless cookbooks for cookies, breads, or candies, I Google, I invent ideas, and then I finally land on something.  It's a fun process, but I really want the end result to be enjoyed, useful, and - of course - straight from the kitchen.  

This year, I thought about what could be tasty AND helpful, and I came up with the idea of gifting a breakfast casserole.  I had in mind several of the recipients who were hosting their in-laws, their college kids, or just their own immediate families, and I thought it might be neat to have a frozen, ready-to-thaw-and-bake breakfast on hand.  At least it would be one meal taken care of for them. For a few, I paired the casserole with the cinnamon swirl bread from my last post, and for others, I par-baked and froze these cinnamon rolls.  All of them I tied off with a small bag of flavored coffee.  

I have to say this casserole is one of the tastiest I've ever had.  The array of vegetables absolutely makes it and the ability to adjust and customize to one's liking is its best feature!  For the casseroles I gave away, I did a combination of breads for the bottom layer - sourdough, country white, and whole wheat.  For ours here at home, I used this sandwich bread, which I've been using for the last few months as I watch my carb intake.  The bread could easily be left out or replaced with some kind of potato, if desired.  To gift, I made the casserole in an aluminum pan through the last step before baking, wrapped in plastic wrap and then foil, and then froze it completely over night.  I provided the instructions on how to thaw and bake when I delivered the final product.  

If you are needing an idea for breakfast, brunch, or even a dinner over the next couple of weeks, I think you will find this recipe a winner.  You can sub and adjust to your heart's desire... any kind of protein, bread or vegetable, it's your choice!  And I love options, don't you?  But more than anything, I love great flavor.  Bon appetit!  

Easy Make-Ahead Breakfast Casserole

makes one 9x13 or two 8x8 pans

  • 3/4 lb uncooked sausage, casings removed (or meat of choice)
  • 1 tsp dried rosemary (optional)
  • 2 bell peppers, diced ( I used yellow, orange and red)
  • 1/2 medium onion, diced
  • 1 tsp minced garlic
  • 1 cup sliced mushrooms
  • 1 cup fresh spinach
  • salt and fresh ground pepper
  • 4 slices day-old bread of choice, cubed (you can put in 400 degree oven for a few minutes, if needing it quickly)
  • 10 large eggs
  • 1/2 cup milk (I used whole, but any milk will work)
  • 1/2 cup shredded cheese (again, choose your favorite, but I used pepper jack 
1. Cook sausage (and rosemary, if using) until fully browned.

2. Once some fat has been rendered from the sausage, pour a couple of tablespoons in a separate pan and cook the onions and peppers until tender, about 7-10 minutes while sausage finishes cooking.  

3. Add in garlic and mushrooms and cook a couple of minutes before adding spinach.  Cook briefly until spinach just wilts. 

4. Pour vegetables and sausage into large bowl and thoroughly combine, adding salt and pepper to taste.

5. Place bread in bottom of pan/s coated with butter.  

6. Beat eggs, milk and 1/4 cup of the cheese until well blended.  Pour half of the mixture over the layer of bread.

7. Layer the sausage/vegetable mixture over the eggs and pour remaining egg mixture over that.  

8. Finish with the remaining cheese and another sprinkling of salt and pepper.  

9. If freezing, wrap in plastic and then foil and place in the freezer for up to three months.  When ready to use, thaw in fridge overnight, bring to room temperature and cook at 375 degrees for 40-45 minutes, or until good and browned and center is set.

10. If using next day, cover casserole and place in fridge several hours, or overnight.  Bring to room temperature, and cook at 375 degrees for 40-45 minutes, or until good and browned and center is set.

11. Cool for 10 minutes, slice and serve.

Recipe from Sally's Baking Addiction. 


Thursday, December 14, 2017

cinnamon swirl bread


One of my favorite activities of the year is our youth group's annual baking party. We have a fantastic and supportive congregation who encourages and contributes so much to our group.  A few years ago, we decided to say "Thank you!" through a holiday baking marathon.

In theory it sounded like a breeze until a pretty good-sized group of teenagers showed up all at once, eager to roll up their sleeves and get cooking.  Only then did I realize I really should have had a plan.

We began measuring, pouring, cracking and whisking all kinds of craziness together to try to bake every family in our congregation a loaf of bread - about 150 total.  Several hours (and a bajillion trips up and down the stairs with trays of loaf pans going into the ovens on two different floors) later, we actually had loaves that resembled pumpkin cranberry bread.  Honestly, they were pretty good, but let's just say they all had their own "unique" style.


Over the years we have gotten a little better as we've kept up the tradition, but this year we decided to try a different bread.  I had baked Cinnamon Swirl Bread a handful of times and thought it might be a good one to do. The buttermilk makes it incredibly tender, the house smells unbelievable as it bakes, and a little cinnamon-sugar caramelization on top of anything is never a bad thing.

If you're wanting a good sweet bread to gift to someone this season, I encourage you to try this. The recipe will make one regular-sized loaf or three mini loaves.  Enjoy!

Cinnamon Swirl Bread

makes one 9x5 loaf or three mini loaves
  • 1 cup sugar, divided
  • 1 tbsp cinnamon
  • 2 cups all-purpose flour
  • 1 tsp baking soda
  • 1/2 tsp salt
  • 1 egg
  • 1 cup buttermilk
  • 1/4 cup vegetable oil
1. Preheat oven to 350 degrees, and spray and flour baking pan (or three mini pans, if using).  

2. Mix 1/2 cup sugar and cinnamon together in small bowl.  Set aside.

2. In a medium bowl, whisk together the flour, baking soda, salt and remaining 1/2 cup sugar.  

3. In a separate bowl, mix together egg, buttermilk and vegetable oil.  

4. Add wet ingredients to dry ingredients, mixing just until combined.

5. Put half of the batter in the pan. Batter is a bit thick, and I have found that an ice cream scoop works well here.  With the back of a spoon, spread batter to cover bottom evenly.

6. Sprinkle enough cinnamon-sugar mixture over the top of the batter to cover it well.

7. Spread the last of the batter over the cinnamon-sugar layer, smoothing to edges again.  Cover with more cinnamon-sugar mixture.  Save any cinnamon-sugar mixture left for another use.

8. Place knife in batter and swirl through the batter twisting and turning as you move through.  Again, it's thicker batter, so it will not be ultra-smooth.  Use the tip of your knife to "poke" the batter to an even thickness.

9. If cooking a large loaf, bake for 50-55 minutes.  If doing mini loaves, check at 35 minutes, and bake until top is set and toothpick comes out clean.

Recipe adapted from Taste of Home. 


Friday, December 23, 2016

old-fashioned pecan logs


Growing up, we would travel to Florida every fall.  It was a different time then, and my parents didn't think twice about pulling me out of school for a week or ten days in October to head south. Teachers were excited for me.  They would load me up with daily homework and happily send me on my way.  I can very clearly remember waking each morning, sitting at the hotel desk in the room, and finishing up my academic requirements before hitting Disney or the beach.  First work, then play, right?

But even more clearly than that, I remember what we'd always do as soon as we'd cross the Florida state line.  We'd stop at the roadside stand for fresh orange juice and then the first Stuckey's we'd see to get Ma a pecan log.  She loved those things and still does.  My family doesn't make annual Florida trips anymore, but my sweet dad does travel with his job, and when he gets home, many times you'll find a pecan log sticking out of his pocket from a Cracker Barrel he's encountered.  Ma lights up when she sees it; she knows it's for her.

This year I decided I was going to try my hand at a homemade version.  I have wanted to try for what seems like forever, and this year was the year.  Ma has made it very clear she wants nothing for Christmas (except the annual calendar of pictures I make her, of which she reminds me from January until November).  But I am fairly certain that when she opens up one of her favorite confections, she'll receive it with a glad heart.

I can't say I've been a fan of marshmallow cream in the past.  I'm a chocolate girl, through and through.  But, folks, you have to hear me when I say these are so very, very good.  They are easy. They are seriously fun to make.  And the combination of the cream, the vanilla and almond flavorings, dipped first in caramel and then rolled in pecans... Oh. My.  I love me some Cracker Barrel, but I'm here to say there's no comparison.

I have wrapped the eight logs my recipe made in brown paper-like tissue and tied the ends off with raffia.  They just have a nostalgic feel and would make a great hostess gift, stocking stuffer or quick sweet addition to your dessert table this weekend.  An old-fashioned (family) candy Christmas.  Clark Griswold would be proud.

So, what's your favorite Christmas candy?  Would love to know! 

one year ago: aunt brenda's cranberry jello salad, a feast for the birds, grandma puryear's punch

Old-Fashioned Pecan Logs

makes approximately eight 4-inch logs
printable recipe
  • 1 jar (7 oz) marshmallow cream
  • 1/4 tsp almond extract
  • 1 tsp vanilla extract
  • 1 lb confectioner's sugar, sifted
  • 1 lb caramels
  • 2-3 tbsp evaporated milk
  • 2-3 cups coarsely chopped pecans
1. Mix cream, almond and vanilla in a large bowl (wooden spoon works well).  

2. Add in sifted sugar, kneading into the cream mixture as it's added.  This sounds like it's going to be hard, but it isn't at all.  Think of watching taffy being made, and how it's pulled and stretched. It takes a little while, but eventually, as you press and fold the marshmallow mixture, the sugar will become incorporated.

3. Roll cream into four eight-inch logs, about an inch in diameter.  Cut in half and wrap in wax paper, twisting ends to seal.  Store in refrigerator overnight, or at least 4-5 hours.

4. About 20 minutes before removing logs, melt caramels in double broiler.  You can do this by placing a heat safe bowl in a sauce pan with 1 to 2 inches of boiling water.  Make sure the bowl is bigger than the pan, so that it sits above the water and not in it.  Stir intermittently to keep caramels moving and melting evenly.  You can also heat in microwave in 15-20 second increments, stirring each time once caramels begin to melt.   

5. Add milk as caramels melt to ease stirring and thin out the caramel.

6. Remove logs from fridge and dip in caramel (I used tongs), allowing some of the excess to drip off.  Place in pan of chopped pecans and scoop pecan over log to help with the rolling of the log to cover.  This keeps it from sticking to your hands.  As you roll, gently press to ensure pecans stick.  

7. Re-wrap logs in wax paper and store in a cool, dry place.  

Wednesday, February 26, 2014

homemade enchilada sauce


Nine times out of ten, I am usually thankful when I've planned to prepare a really great dish and get home from gathering all the necessary ingredients from the store, only to realize I've forgotten one.  

Well, actually, first I'm mad.  

But then I am thankful, because more times than not, I am able to scrounge enough things together to make the missing ingredient from scratch, and it's way better than store-bought. So goes this enchilada sauce.

I wish I could have gotten pictures of the casserole calling for the sauce, but it went so fast I wasn't able to save even a piece to snap a shot the next day.  Chicken Tamale Casserole will be prepared again soon, I can assure you, and I will make sure to share the recipe.  

I highly recommend pulling this together, doubling the batch, and keeping it on hand for your favorite Mexican meals.  I can't believe the flavor difference in this and the store brands, and it is such a quick fix.  "Muy" yummy!

Homemade Enchilada Sauce
Ingredients:
  • 2 tbsp vegetable or canola oil
  • 2 tbsp flour
  • 4 tbsp chili powder
  • 1/2 tsp garlic powder
  • 1/2 tsp salt
  • 1/4 tsp cumin
  • 1/3 tsp oregano
  • 2 cups chicken broth
~ Heat oil in a small saucepan over medium-high heat.  

~ Add flour and stir together over the heat for one minute.  

~ Stir in the remaining seasonings.  

~ Gradually add in the broth, whisking constantly to remove lumps.  

~ Reduce heat and simmer 10-15 minutes until thick.

Recipe from Gimme Some Oven.


Monday, January 6, 2014

pumpkin maple swirl butter


Waiting for word on whether or not school is out with fingers and toes crossed.  You'd think after two full weeks of vacation for the holiday, I'd be OK going back.  But, oh my.  These sweet moments with family are hard to let go.  And the mornings... how I love the mornings of lazy days.  Especially when they're not planned ones.  

I'm visualizing a mid-morning breakfast following my first cup of coffee (Sumatran Reserve, to be exact), biscuits and gravy, country ham, eggs (scrambled for Daniel, over-easy for John), Luke's pancakes...

And this butter.  This butter, I adore.

Last year I blogged about my Berry Butter.  At nearly 40,000 hits, it has - by far - been the most popular post of the blog.  I really have meant to come up with another one before now, but good things are worth waiting for, right?  

Complete with a dash of Kosher salt and swirls of pure maple syrup, this creamy pumpkin treasure is smooth and balanced.  I've thoroughly enjoyed it on the Pecan Wheat Bread I featured in my last post, but it's also a wonderful accompaniment to pancakes, sourdough, yeast rolls, you name it!

I hope everyone stays warm and safe over the next few days.  Stay tuned to the blog... more great posts coming your way!

Pumpkin Maple Swirl Butter
makes one cup
  • 2 sticks unsalted butter, softened
  • 1 tbsp confectioner's sugar
  • 1/4 cup plus 2 tbsp pumpkin puree
  • 3 tbsp pure maple syrup
  • 1/2 tsp pumpkin pie spice
  • 1/2 tsp Kosher salt
~ Whip butter and sugar until pale and fluffy.

~ Gradually add pumpkin, scraping sides periodically.  Cream until fully incorporated.

~ Add syrup, spice and salt.  Mix well.

~ Seal in airtight container and store in refrigerator for up to two weeks or freeze up to 
   three months.


Friday, January 3, 2014

pecan wheat bread


I really think I could be perfectly happy spending day after day just experimenting with different bread recipes.  Call it weird, but I can't tell you the excitement that builds when I'm getting ready to give a new one a try.  And the excitement goes overboard when the trial results in a great success.  This recipe was just that!

A couple of months before Christmas rolls around, I begin to think about what goodies from our kitchen I'll be sharing with loved ones.  Loaves of bread are always at the top of the list, and I usually have to narrow down favorites to finally decide on one.  After baking a few of these tasty loaves, and loving the unique flavor of the featured pecans, I definitely knew this one was the one.  AND, I knew it would pair beautifully with the homemade butter I made for the give-aways as well (Pumpkin Maple Swirl Butter, to be exact... I'll be sharing that with you next).  

Although this makes a great sandwich bread, especially for chicken salad, I think I've enjoyed making toast with it more than anything.  When you do so, the pecans get toasted and the flavor is deepened immensely.  If you are a fan of nutty, chewy yeasted breads, you will love this. It will make one 9x5 loaf or three good-sized mini loaves ~ just perfect for gift-giving.  

Happy New Year!

Pecan Yeast Bread
makes one 9x5 loaf
  • 1 cup plus 2 tbsp warm water (approximately 110 degrees)
  • 3 tbsp dark brown sugar
  • 2 tsp instant yeast
  • 1 1/4 tsp salt
  • 2 tbsp butter, melted
  • 2 cups bread flour
  • 1 cup whole wheat flour
  • 1 cup diced pecans
~ Pour water into stand mixer and add sugar, stirring until dissolved.  Add yeast and stir.

~ Let mixture stand until foamy, about 5 minutes.

~ Add butter and salt and stir.

~ In separate bowl, whisk flours together.  

~ Place dough hook on mixer and gradually add flours to water mixture, scraping the bowl 
    periodically.  Continue to mix until smooth dough is formed, or remove dough and knead
    by hand about 10 minutes.

~ Place dough in greased pan/pans, cover and let rise in warm place until about one inch 
    above pan, approximately one hour.  

~ Preheat oven to 350 degrees.  Place uncovered dough in oven and bake 35 to 45 minutes, 
    or until loaf reaches 190 degrees.  Remove from oven and turn out on cooling rack.  

Recipe from King Arthur Flour.


Wednesday, June 19, 2013

love people; cook them tasty rosemary bread (a la macaroni grill)


Be still my beating heart.  My absolute favorite thing about Macaroni Grill can be made in my very own kitchen?!?

I really didn't think it was possible.  I read over several recipes claiming to have the "perfect version," but how could I know the one I chose would work so well?  

Pulling the loaves from the oven, smelling the Rosemary, I had my fingers crossed.  Painting a thin finish coat of olive oil and sprinkling a pinch of salt atop, I was hopeful.  But I would have never imagined in this first attempt I would have been so pleased with the outcome.  A soft, chewy crumb on the inside, a crisp golden crust on the outside.  

My friends... I am smitten.

And I’m sure for every one of me, there are a hundred others who would feel the same about receiving their own homemade version of this bread.  That's why you must try your hand at this fast, and share one loaf with a dear friend, a new neighbor, anyone.  Simply wrapped in a towel and placed in a basket with small bottles of olive oil and balsamic vinegar (my favorite bread-dipping combo), you have a perfect hostess treat or teacher thank you.

I'm serious.  Find a couple of hours to roll up your sleeves and follow the directions below.  In your generosity, you will fill a belly all while satisfying your own heart.  Go, now, and bless someone.

"Give, and it will be given to you.  
Good measure, pressed down, shaken together, running over, will be put into your lap.  For with the measure you use, it will be measured back to you."  
Luke 6:38    

Rosemary Bread - makes 2 round loaves
Ingredients:
  • 1 tbsp. yeast
  • 1 tbsp. sugar
  • 1 cup warm water
  • 1 tbsp. butter, melted
  • 2 1/2 cups flour*
  • 1 tsp. salt (plus more for garnish)**
  • 2 tbsp. Rosemary, finely chopped
  • 1 egg white (with splash of water)
~ Place yeast, sugar and water in large bowl of stand mixer and allow to become bubbly;
    about 5 minutes.
~ Mix in butter, 1 tsp. salt, and flour.
~ Add 1 tbsp. Rosemary.
~ With dough hook (or by hand), knead in the bowl for about 5 minutes (or 10, if by hand)
    until smooth and elastic.
~ Lightly oil a large bowl and put dough inside.  Lightly spray a piece of plastic wrap and 
    cover bowl.
~ Let dough rise in warm place until doubled, about one hour.
~ Punch down dough and divide in half.
~ Let dough rest about 5 minutes.
~ Spray baking pan or cookie sheet with cooking spray.
~ Shape dough into 2 small rounded loaves.
~ Let rise again until doubled, about 1 hour.  
~ Preheat oven to 375 degrees.
~ Bake 10 minutes.
~ Meanwhile, make egg white wash by beating egg white with a splash of water.
~ Remove loaves after 10 minutes and brush surface with wash.
~ Sprinkle remaining Rosemary and course salt over wash; return to oven.
~ Continue baking another 10 minutes until golden.
~ If desired, brush lightly with olive oil and finish with one more pinch of salt.   

Tips and Tricks

* I used King Arthur Unbleached Bread Flour for this recipe.  The 2 1/2 cups worked perfectly and only required I lightly flour my hands and the surface before hand-kneading.  Depending on humidity and your measure of the water, more flour may be needed to prevent extensive "sticking," although I didn't find it necessary.

** I used regular salt for the 1 tsp. called for and Kosher salt for the finishing touches.  


Recipe adapted from food.com

Monday, February 25, 2013

cherry chocolate coconut granola


Granola is as versatile as the day is long.  It can be eaten on yogurt, in milk, by the hands full, in ice cream...  I am really loving it lately.  

I am a huge fan of the Caramel Apple variety I made last fall.  I decided for the winter, and in particular, honoring Valentine's Day, I'd search for a chocolate cherry option.  This one fit the bill nicely and made good V-day gifts for the boys' teachers.  

I adore dark chocolate, so I chose to do a Ghiradelli 60% cacao bar as my chocolate of choice. Obviously, if you don't appreciate that deeper, slightly bitter flair, go for milk chocolate.  

Hey!  Maybe you have a chocolate Easter bunny hiding in the back of your pantry too!  

I have shared before how I'd love to have a bed and breakfast one day.  And with that, it would thrill me to have a few items to stock a small shop... a few baked goods, homey art, maybe a smattering of hand-sewn or knitted items.  Maybe I'll have a "granola of the season" to serve for breakfast and also buy by the scoop.  What do you think?  Hmm...  Fall and Winter are covered. On to Spring, I say.  

My wheels are spinning...


Cherry Chocolate Coconut Granola
makes about 14 cups
Ingredients:
  • 2 cups shredded coconut (sweetened or unsweetened)
  • 2/3 cups walnuts, coarsely chopped
  • 2/3 cups sliced almonds
  • 6 cups old-fashioned rolled oats
  • 6 tbsp. canola oil
  • 1 cup honey
  • 1/2 tsp. ground cinnamon
  • 1/2 tsp. salt
  • 2 cups dried cherries
  • 8 oz. chocolate, coarsely chopped
~ Preheat the oven to 325 degrees.  
~ Line a baking sheet with parchment paper.  
~ Place a large* skillet over medium heat.  Add the coconut to the pan in an even layer and
    cook, stirring frequently, until lightly browned and toasted.  
~ Transfer to a bowl and wipe out the pan.  Return the pan to the heat and add the chopped 
    walnuts and sliced almonds.  
~ Cook, stirring occasionally, until lightly browned, about 3-4 minutes.  
~ Stir in the oats and canola oil and continue to cook, stirring occasionally, until the oats
   are lightly toasted, about 3 minutes.
~ Transfer the oat mixture to a large bowl and stir in the honey, cinnamon, and salt.  
~ Spread out onto the prepared baking sheet in an even layer.  
~ Bake, stirring every few minutes, until the granola is light golden brown, about 20 
    minutes.  
~ Stir in the toasted coconut and dried cherries.  
~ Move the granola to one side of the baking sheet and press gently into a thick slab.  Let
    cool to room temperature.  
~ Break the dried and cooled granola into small clusters, mix in the chopped chocolate, and
    store in an airtight container.

Tips and Tricks

*This requires a good amount of ingredients to fit in the skillet.  Make sure to use a large pan or have a stock pot of sorts handy.
  • The mixture might appear "wet" for quite a while.  The original recipe called for stirring and baking for 15 minutes.  Mine was closer to 20 to 22 minutes.  It will harden as it cools.

  • This keeps in an airtight container in the fridge for a good while.  At nearly two weeks, it still tasted fresh.  I think glass containers help with the freshness factor.

Recipe barely adapted from Annie's Eats 


Thursday, December 27, 2012

blackberry butter


It is crazy to me how fast time flies.  Wasn't I just blogging yesterday about the blackberry discovery we made on our summer trip to Gatlinburg?  Now, it's nearly six months later, and we're far from summer vacationing.

I had about a half gallon of blackberries left from our trip, hanging out in the deep freezer.  While trying to think about options for Christmas goodie bags, I ran all kinds of ideas through my head of how to use up the berries.  The Amish White Bread was already a definite for the bags, so it didn't take me too long to determine that a good butter would make a great companion.


Blackberry Butter was born.

For the bags, I packaged them in logs, wrapped in parchment paper, twisted and twined on the ends.  I also gave them to others in canning jars.  Either way, I was pleased with the presentation and equally satisfied with the flavor.  I'm looking forward to experimenting with some other butter ideas.  I already love the stuff in its truest form...  why not consider other ways to make it interesting and fun?

Happy whipping!

Blackberry Butter - makes one pound of butter
Ingredients:
  • 1 pound salted butter, softened
  • 1/8 cup of honey
  • 1/2 cup blackberries
~ Whip together butter and honey until fluffy.
~ Add in berries and mix in short bursts until desired look is achieved.  I did not want mine
   to be completely emulsified, so I "broke" up the berries slightly with just a few turns of 
   the paddle attachment.
~ If storing in jars, scoop into jar and wipe mouth clean.  Cap and refrigerate.
~ If storing in logs, place a piece of plastic wrap over a piece of aluminum foil the same size.  
~ Scoop out butter along length of wrap/foil, folding wrap over butter and rolling into 
   consistent-sized cylinder.  Roll up foil around log and twist ends.  Refrigerate or freeze.

Recipe from The Lazy Daisy Kitchen.

Sunday, December 23, 2012

rise n' shine christmas bags


"There's a light in your eyes."

That's what John said the night I was making up the items to fill my Christmas goodie bags this year.  Our kitchen and dining room was like what I would imagine Santa's might be... Christmas music playing, little fingers coming in to sneak a bite here and there, twine and yarn strung all over the place...

I could do this for a living.  Don't know that anything would sell, but my-oh-my, would I have fun!

I thought I'd share with you what I included in the Rise 'n Shine Christmas bag:


Mini loaf of Amish White Bread


Mini log of Blackberry Butter


Gingerbread Christmas Tree cookie


I topped it all off with a small bag of Dunkin' Donuts coffee.  Two of the recipes were previous posts, and you can link to them from above.  The other two I'll post soon.  In fact, make sure you have flour, salt, brown sugar, molasses, allspice, cinnamon, ginger, cloves, butter, shortening and eggs on hand.  We'll bake up the gingerbread tomorrow - a perfect Christmas Eve treat!

I hope you're enjoying time with family and friends.  Can't wait to share more with you in the days ahead...

Love to all!


Wednesday, December 5, 2012

caramel apple granola


It's December and life is officially crazy, but the craziness is for wonderful reasons, really.  There is something about a little Harry Conick, Jr. holiday music and Charlie Brown Christmas lights that makes the craziness easier to handle.

I totally love Christmas.

Cooking during this season is nothing short of delightful to me.  At the very same time, it's maddening to not have enough time to try the vast number of recipes that grace the covers of magazines, blog posts, and treasured cookbooks collected over the years.  I always promise myself to start the "taste-testing" earlier in the year, but like so many plans made... well... you know.

This recipe produces a wonderful result... the tastiest granola I think I've ever had.  Considering the flavor combo, one would think it should have been posted in the heart of Fall, but I chose to share it now because I think it would make a perfect homemade gift for the holidays.  I am still trying to nail down how to package it, and the accompanying items, but it's definitely going in the basket of goodies.

Please note that when you pour the homemade caramel (I know... delicious!) over the granola, work fast.  I did splash a tad of water into the bowl just after adding to make the stirring a little easier and ensure full coverage.

I hope to be back sooner than later.  I'm working to fit it all in.  I'm also working to remember that during the hectic season, craziness or not, each day is one the Lord has made... rejoice with me!

Caramel Apple Granola - 
makes approximately 4 cups
Ingredients:
  • 2 cups old-fashioned oats
  • 1/2 cup sliced almonds
  • 1/2 tsp. ground cinnamon
  • 1/8 tsp. ground nutmeg
  • 1/8 tsp. ground cloves
  • 1/8 tsp. ground ginger
  • Pinch of salt
  • 1 cup dried apples, cut into small pieces and lightly packed
  • 3/4 cup granulated sugar
  • 3 tbsp. water
  • 3 tbsp. butter
~ Preheat oven to 350 degrees F.
~ In a large mixing bowl, whisk together the oats, almonds, spices, salt, and dried apples. 
    Set aside.
~ In a large saucepan, stir together the sugar and water. 
~ Scrape down sides of pan and let sugar boil over medium high heat, without stirring, 
    until sugar reaches a golden amber color If the sugar becomes too dark, it may turn the 
    caramel bitter. 
~ Remove from heat and immediately add the butter, stirring until melted and smooth.
~ Pour the caramel over the oat mixture and quickly stir to coat evenly (this is where I  
    added the water). 
~ Spread granola evenly onto a baking pan and bake for 15-18 minutes, stirring 
    occasionally, until the granola is golden in color (if the caramel begins to darken too 
    quickly, remove the granola from the oven to prevent further darkening). 
~ Remove from the oven and allow to cool to room temperature before serving or storing.

Recipe from The Pastry Affair.